1866 Brick townhouse in Boston, South End.
- Clear damaged materials and debris.
- Fix water problem.
- Build beautiful wood-paneled study with cabinets and bookshelves.
2004 – 2005

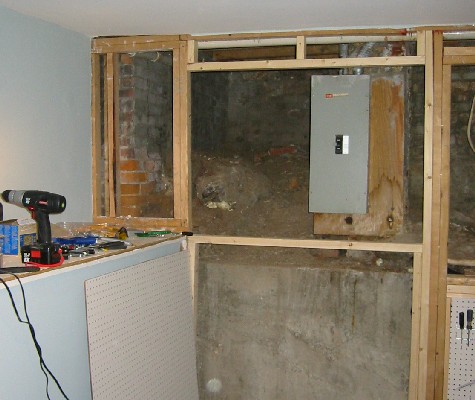
Water was trapped in the insulation, growing mold, and peeling the paint off the
walls. Upon closer inspection, studs were rotten and there was no access to the foundation because there was too much dirt.
About 3000 lbs of rubble, dirt, concrete, and garbage had to be removed.
It takes a very committed friend to help with a project like this. Jon Dubrow actually climbed into the walls and excavated with me for several days. Good man.

After finally removing all the debris, we could see the concrete foundation and sewer pipes. Some missing bricks had to be replaced and we used spray-foam insulation in some of the small deep spaces.
The studs were replaced where they had been damaged by water. For a wall that is not load-bearing, I probably over-engineered it, but at least now it’s very solid.
Installing peg-board provides a safe and convenient place to hang tools for the remainder of the project.
There is enough space on the left to use (possibly). The depth is about 7 feet, although the height shrinks to about 2 feet after the 3rd foot in.
In any case, this might become some very rare and valuable storage space.

On the right, near the sewer and incoming water pipes, a small platform now supports a dehumidifier. This turns on if there is enough moisture in the air, and fills its bucket.
Obviously, it would be a bummer to empty the bucket upstairs, so I added a tap into a PVC drain pipe that leads to the sump pump hole. Sorry, no pic of the new sump pump, although now it finally works…

Rather than filling the bucket, the dehumidifier drains to the sump, which gets pumped to the sewer. Don’t have to think about that anymore. 🙂
| In order to protect the electrical lines and interior walls from possible water damage, I added waterproof insulation. If any water were to come from the pipes or wall, it should stay behind the insulation to the floor, then drain into the sump pump hole. | 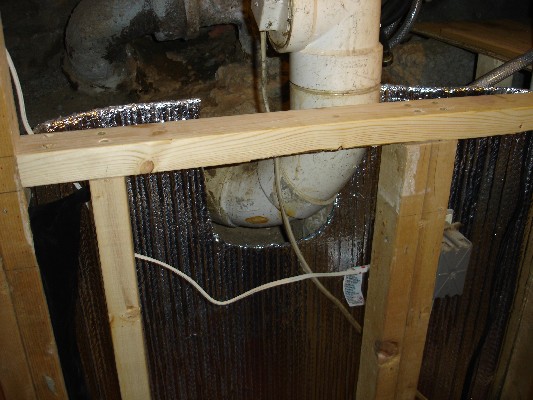 |
| On the electrical side of the insulation, I replaced the outlet with a fault-tolerant one. This will shut itself off in the event of a short circuit (like from water, for example).I also tapped the line for another switch and outlet which I show here. |  |
| Framing out the panels and building the shelves was a big job. The shelves were assembled as 2 units and then mounted in place. Then the top soffit and front molding were added.The storage space in the back is also lined with a level shelf. And a couple extra shelves were added for storage of smaller stuff. | 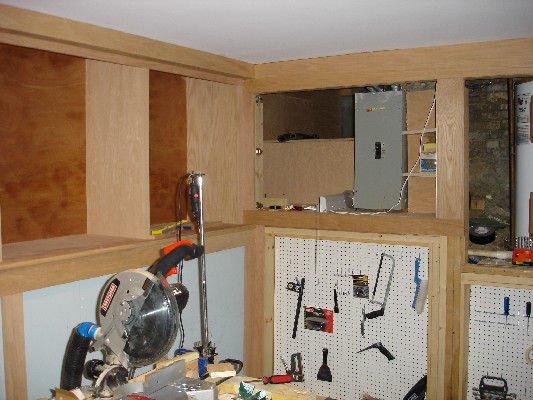 |
| Put a hole in the wall! In order to let in light and to see people coming down the stairs, I took out a section of wall and built a window. Actually, it’s just a frame now, but it will become a window eventually. |  |
| Extending the wood frame past the window will look good, I hope. I’ll try to make it look like the window just interrupts the consistent panel pattern, rather than trying to make panels to fit around the window. | 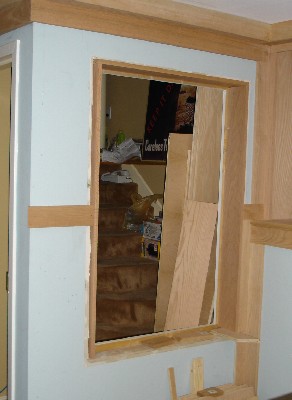 |
| Building cabinets is a tough job. Especially here, because I have to build around a housing for the home water lines. The tolerances have to be quite close for the cabinets that will be added later. Everything has to be very straight and square. I’m setting up the verticals to mirror the panels below, and be symmetrical with the opposite wall. | 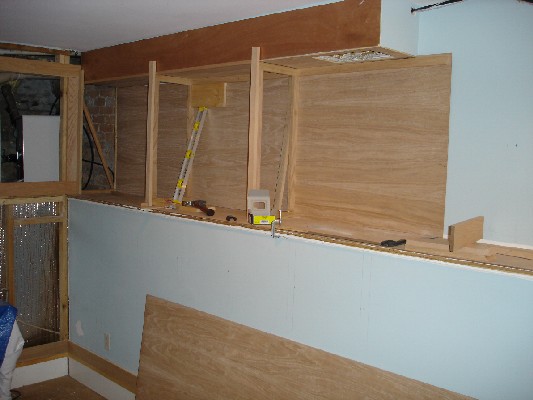 |
| Here, I tapped the living room wall to connect cable, stereo, and gigabit ethernet. | 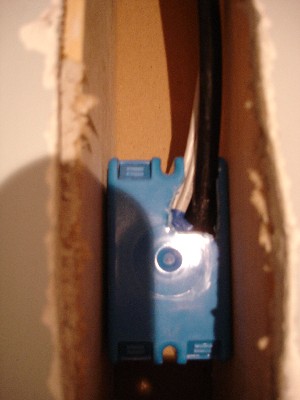 |
| Inside the cabinet, the other side of the cable, stereo, and internet connections provide access to the study. |  |
| I also put a hole to allow for an electrical outlet and surge protector inside the cabinet. | 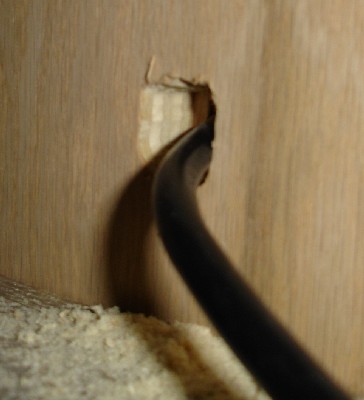 |
| It looks a little cleaner from the other side. |  |
| The cabinet doors arrive and I set the soffit in place. |  |
| The doors are held closed with a clasp. They are very easy to install and hold the doors with a good, solid feel. | 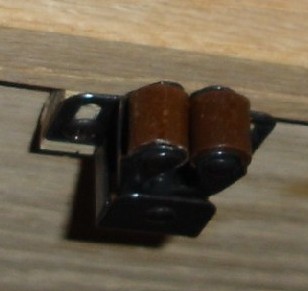 |
| Cabinet hardware is simple, black knobs, drilled and screwed in. They will be removed for final sanding and polyurethane, but for now they look pretty good. |  |
| With all the doors in place, the soffit is attached. | 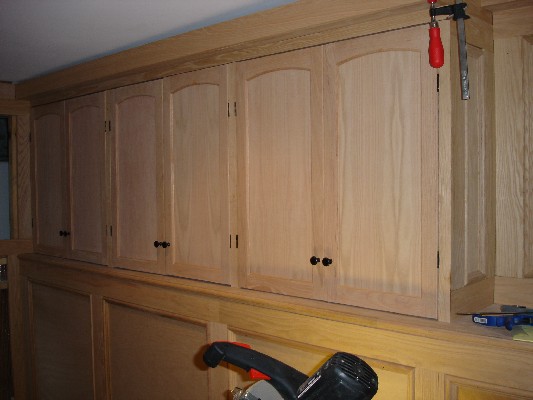 |
| Paneling continues around the lower half of the room. I added a baseboard with a molding on top to match the panel molding. You can see the ceramic tile floor, too. It’s very loud with the miter saw and vacuum. | 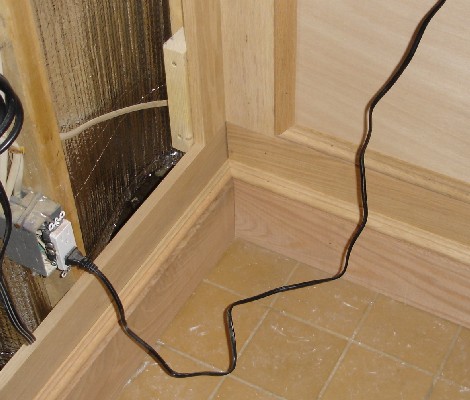 |
| As more panels are completed, the final product starts to become apparent. | 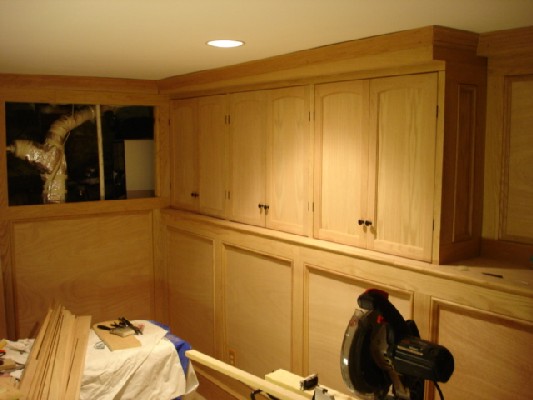 |
| Panels are completed under the bookshelves. There are not yet any shelves, or hardware to support shelves, but we’ll get to that later. Give me a break. Geesh. |  |
| As I’m putting a ceiling in the storage space, I draped it in plastic. Above this area is the laundry, and below it is a concrete grade to the sump hole, so I’d rather have any water go around. This will end up being a dry and strong place for big stuff we don’t need very often. I’m thinking about the tools I’m using for this job… | 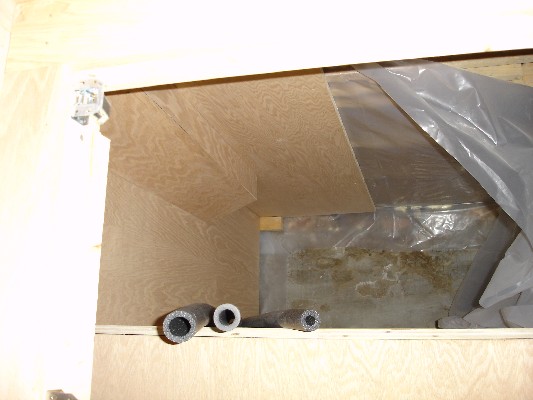 |
| This storage area is connected to the space for the water heater and water pipes. In order to ventilate this area, I installed a fan in the ceiling. I routed the exhaust into a hose and take it up through the ceiling. |  |
| Carefully removing a single stone tile is not easy or fun. But once removed, I could drill a tap hole in the floorboard. It is 1.5″ thick plywood (2 pieces 3/4″ each)! That seems like a lot. With an adequate tap hole, I used a reciprocating saw and a template to cut the hole to fit the exhaust hose.This hose leads to the laundry vent out of the house. | 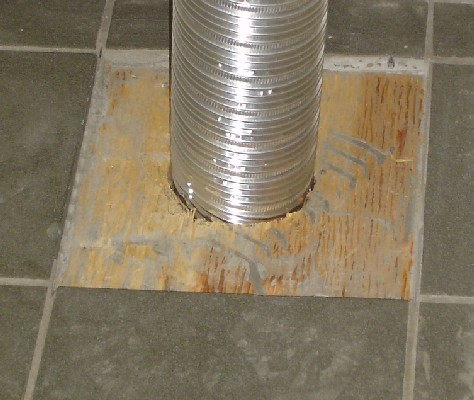 |
| Finished fan. | 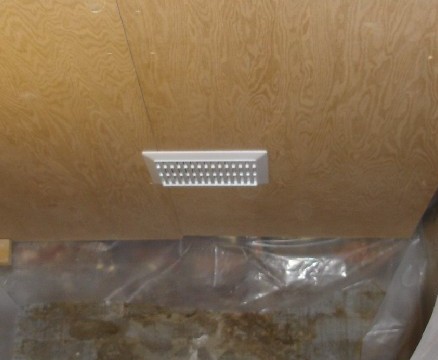 |
| Rather than turn the fan on by hand, this timer turns on the fan from 3:30 to 4:45 every morning. This period of time is estimated to transport twice the volume of air in the room. Fresh air is good. |  |
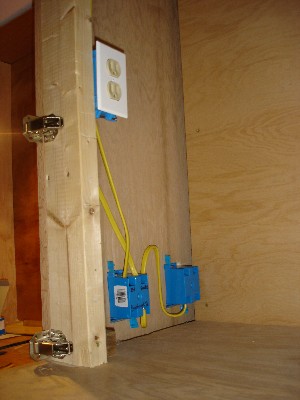
Through the front of the storage area, and into the side of the last bookshelf, I added an electrical outlet and a light switch. The electrical outlet facing you in the picture is actually the light switch outlet. Later, I’ll plug lights into it: recessed lights over the bookshelves and picture lights in 2 spots where there will be art. |
 |
| Here is a front-view of the light switch and the new outlet. I’m hoping to put a bookshelf stereo in here, so this will come in handy. |  |
| Running the electrical line to the new outlet and switch was not too bad, but it did mean crawling around behind the walls a bit. | 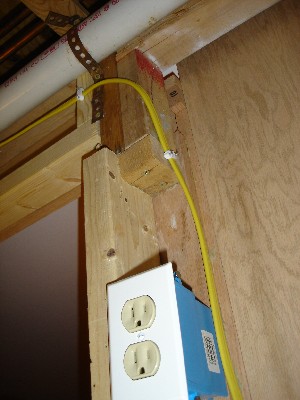 |
| The paneling continues around the room, and around the windows and door. |  |
| I used a nice deep windowsill so that it would be enough room to rest a glass. |  |
| I wasn’t sure how to minimize the fuss of the panel around the window and sill, so I let the panel molding “break” at the sill and just reappear on the bottom. I like the result. |  |
| I’m not thrilled with the white. I wish I could let it go… but you know how it is. | 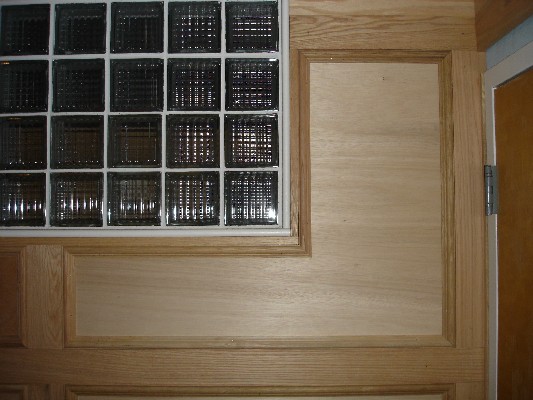 |
| What a mess! The picture lights are dangling so that I can polyurethane around them. |  |
| I skipped the major steps of cleaning, sanding, cleaning again, and 3 coats of polyurethane. Some saints drove in from hundreds of miles away and made it a lot of fun and get done much faster. Thank you!!! |  |
| Commercial carpet tiles (“flor” tiles) are great. These cost about $9 and almost 4 sq ft each. Carpeting over the whole floor took about 4 hours. |  |
| The part of carpeting that took the longest was cutting around the doorframe. But now, this is much warmer and quieter than the ceramic tiles. I went into the room for the first time in socks! This is getting close, and I’m starting to get excited about the electronics. |  |
| My file cabinet is on rollers to make it possible to carpet under it. It also makes it possible to move it until I find a good place for it. There might not be a good place for it. I don’t know what to do about all these files. | 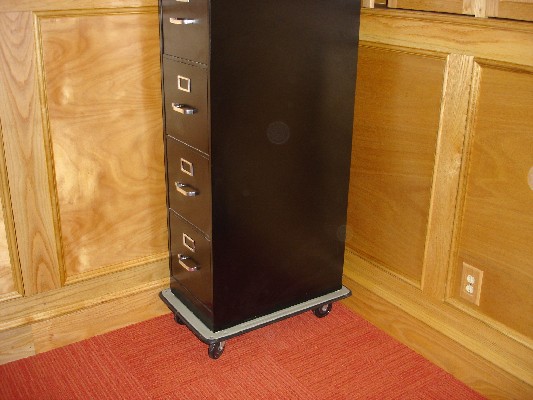 |
| Shelf rails are in place, recessed lights are installed above each bookshelf, and stereo wire runs through the ceiling panels to the bookshelf speakers. | 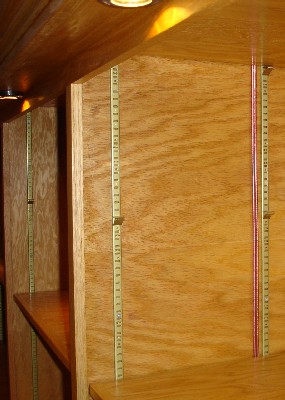 |
| The speaker wire droops a bit, which is not ideal, but there will probably be stuff in front of it, eventually. | 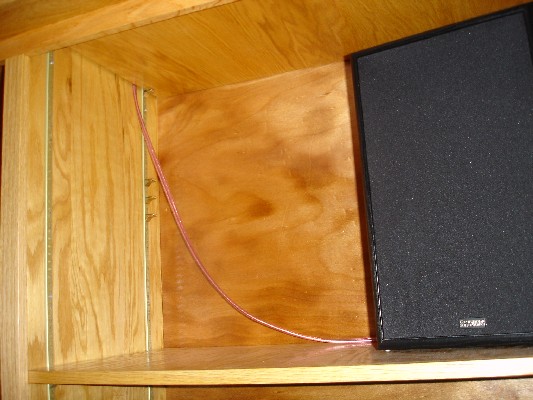 |
| Can’t wait! I move in right away and start working from here. Most of my stuff is still upstairs, so my legs are getting a workout. You know you’re not is great shape when you get winded looking for your stapler and post-it pad. | 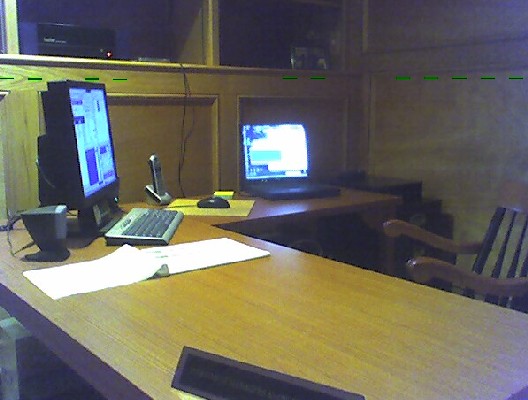 |
In this picture, the rubble pile is about 1/3 its original size. It’s quite heavy, and professional haulers are worth every penny. |
 |
| Moving in! This will be a great place to work.The seating is very comfortable. |  |
| The cabinets work great, and there is power and internet to accomodate a network panel… if you’re into that. |  |
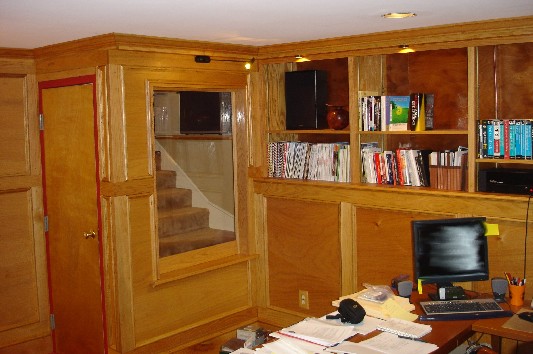
| The window is actually a piece of super strong and sound resistant material. It is much stronger than the wall around it. I’m not worried about someone falling down the stairs and breaking it.My brother-in-law made a stained glass window that fits perfectly into the window and provides beautiful color and privacy (not shown).
The recessed lights are great for showing off my shelves of O’Reilly books. |
 |
Questions? Comments? Recommendations?

Awesome. Great work. Just what i want. Only change for me is Mahogany or dark oak but the same setup.